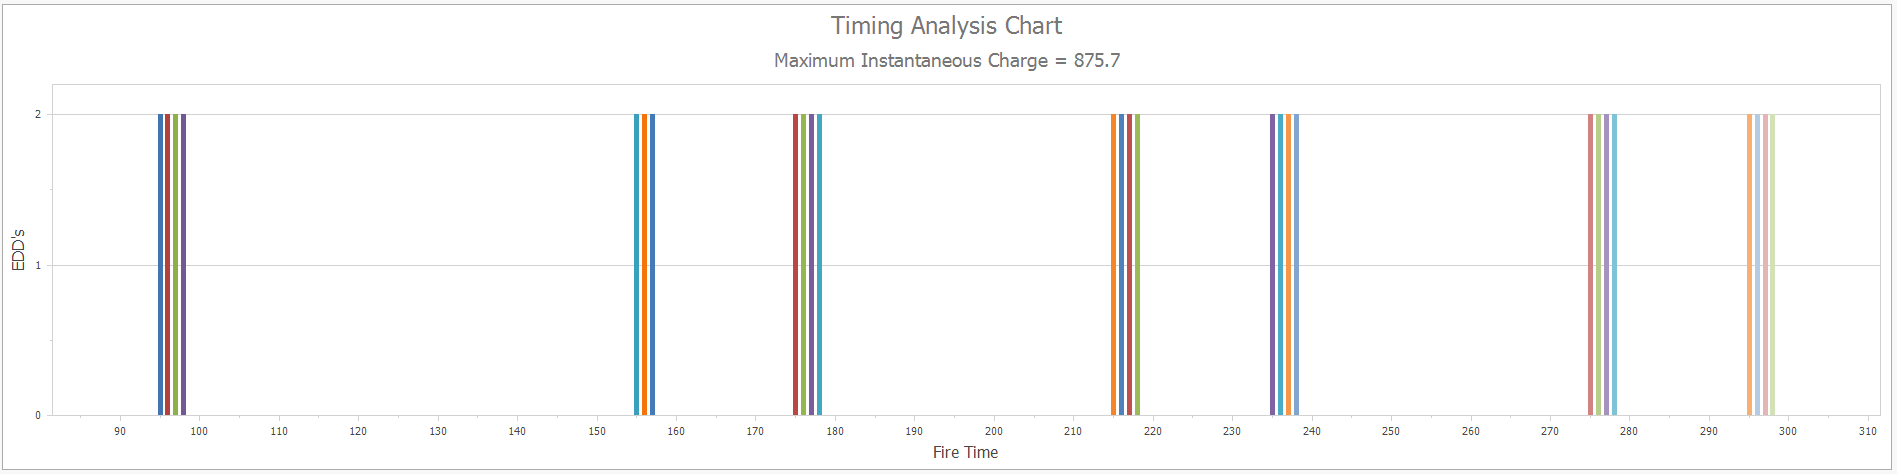
Left click on the chart bars to select decks initiating in that timing windows.
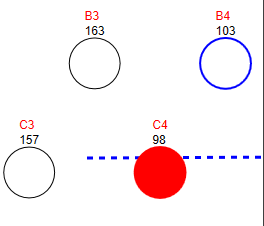
The fire time can be edited here. The selected hole will be filled with a red color and the other holes within the timing window time will be selected with a blue outline. See below.
Its recommended that you save your design before using this function.
This function will automatically adjust the timing and allocate the specified increment value to all the delays that overlaps within the timing windows.
Simulate your timing design after doing this, to make sure the timing is correct.