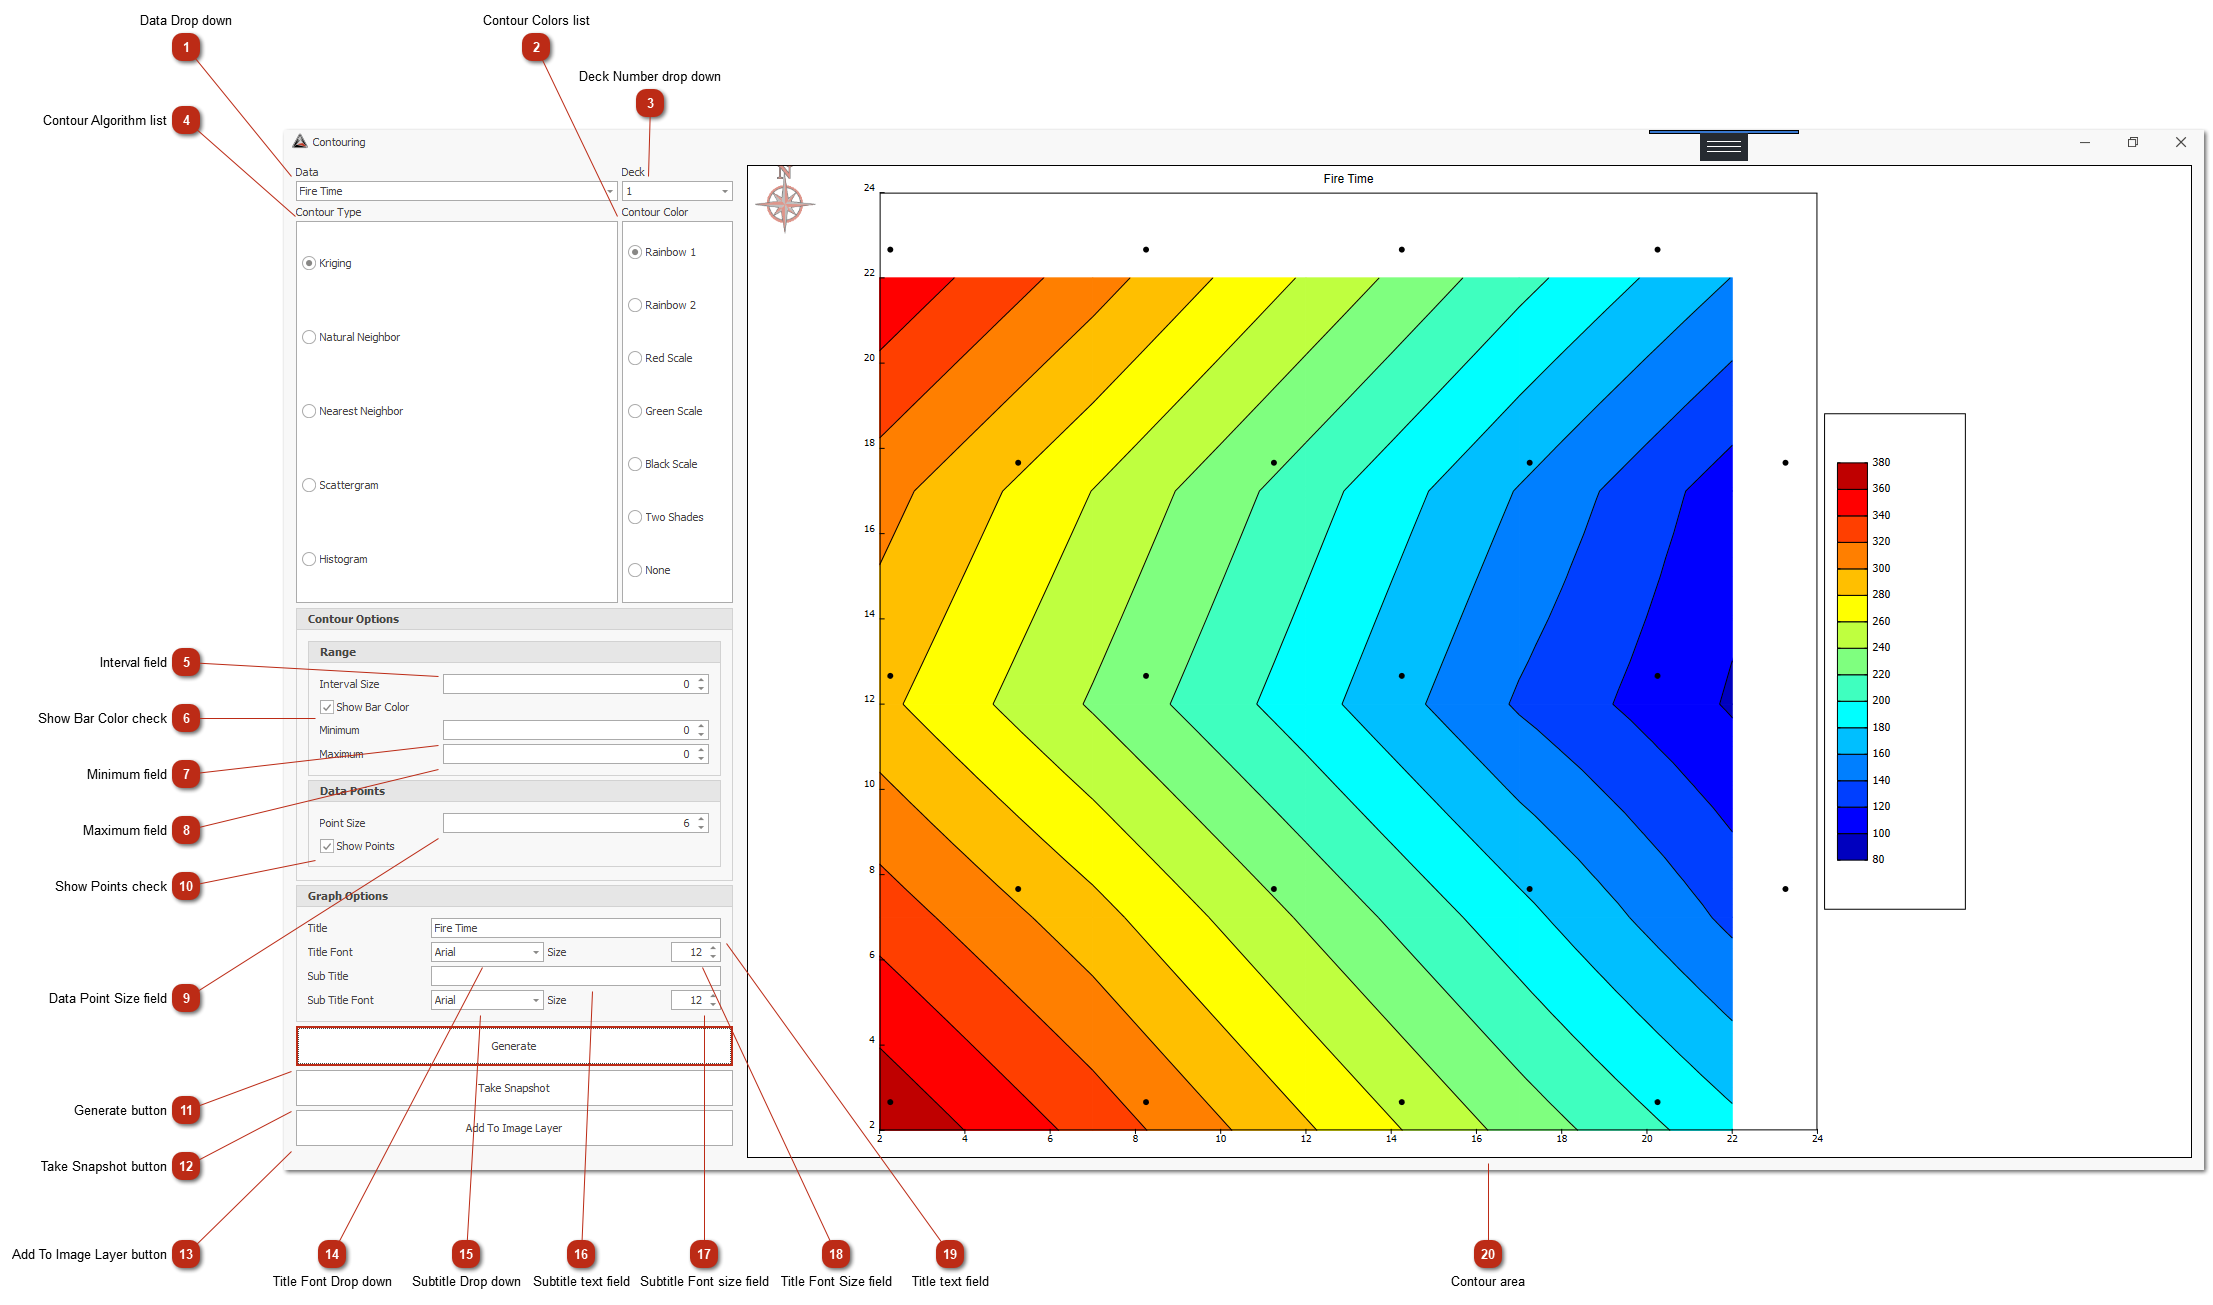
Data Drop downSelect the data that needs to be contoured.
|
|
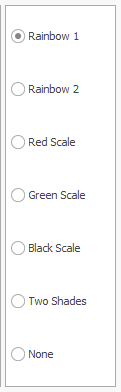
 Contour Colors listChanges the colors of the contour.
|
|
 Deck Number drop downWhen working with decks select the appropriate deck number.
|
|
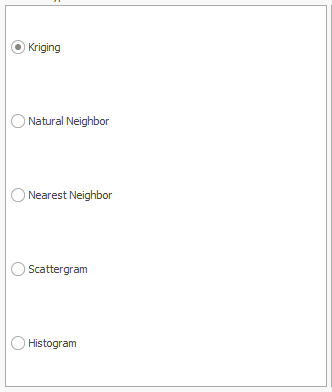
 Contour Algorithm listSelect the algorithm to apply to the contour.
|
|
 Interval fieldSpecify contour interval.
|
|
 Show Bar Color checkDisplays / Hides the color range bar on the right.
|
|
 Minimum fieldEdit the minimum value.
|
|
 Maximum fieldEdit the maximum value.
|
|
 Data Point Size fieldEdit the size of the data point.
|
|
 Show Points checkDisplays / hides the data points on the contour.
|
|
 Generate buttonRefreshes / generates the contour output.
|
|
 Take Snapshot buttonTakes a snapshot image of the contour result and stores in temporary clipboard memory.
Use paste in any other application to paste the image.
|
|
 Add To Image Layer buttonAdds the contour as an image
|
|
 Title Font Drop downFont for title text.
|
|
 Subtitle Drop downFont for subtitle.
|
|
 Subtitle text fieldSubtitle text.
|
|
 Subtitle Font size fieldSubtitle font size.
|
|
 Title Font Size fieldTitle font size.
|
|
 Title text fieldTitle text.
|
|
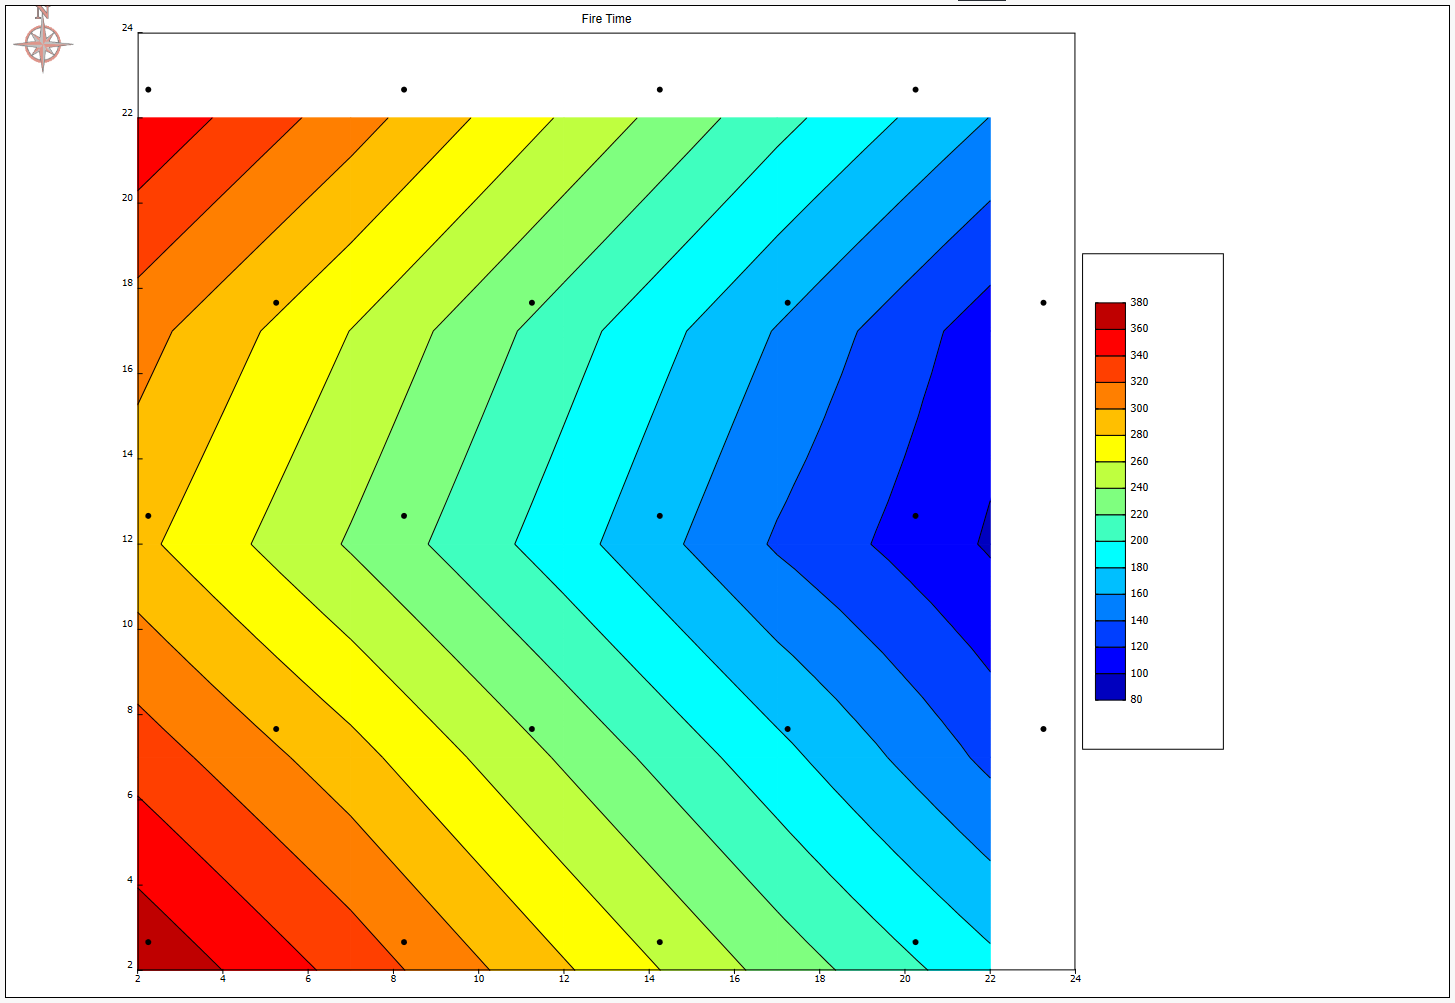
 Contour area
|
|