To properly display this page you need a browser with JavaScript support.
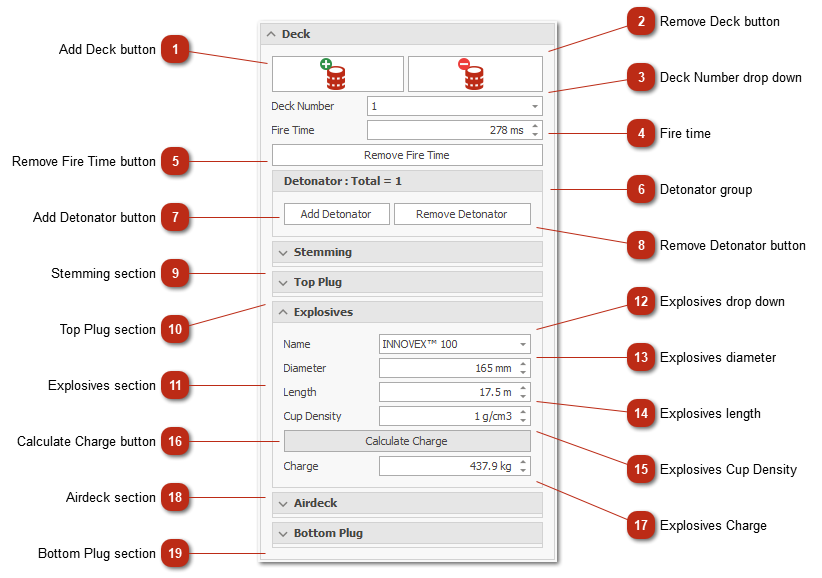
Layout control group element
Add Deck button Pressing this button will add one deck to the top of the selected holes.
Remove Deck button Remove Deck button will remove the current selected deck. Select the deck that needs to be removed and press the Remove Deck button. If there is a deck above it, it will renumber accordingly.
Deck Number drop down With this drop down you can select the current deck you are working on.
The deck numbering direction can be change in user preferences. It can be numbered from top to bottom or bottom to top.
Every value in the deck section that is changed will be allocated to this selected deck number.
Hovering with the mouse over a deck in the hole side view will change the selected deck automatically.
Fire time Changing this value will change the fire time of the selection (selected holes with selected deck number).
Applying a fire time method (Delay Lines, Vector) will overwrite this fire time.
The fire time will be overwritten with non-electric delays every time a fire simulation is run.
Remove Fire Time button Pressing this button will remove the fire time on the selection (selected holes with selected deck number).
This is the method of removing the fire time completely.
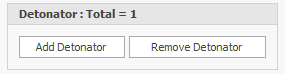
Detonator group Shows the total detonators allocated to the selection (selected holes with selected deck number).
Add Detonator button Pressing this button will add one detonator to the selection (selected holes with selected deck number).
Remove Detonator button Pressing this button will remove one detonator from the selection (selected holes with selected deck number).
Stemming section Section where you can change the top / bottom stemming length of the selection (selected holes with selected deck number).
Top Plug section Section where you can change the top plug length and plug type of the selection (selected holes with selected deck number).
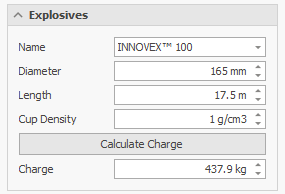
Explosives section Explosives properties for currently selected deck.
Explosives drop down This drop down allocates a explosive to the selection (selected holes with selected deck number).
Explosives diameter Edit field that changes the explosives diameter of the selection (selected holes with selected deck number).
Explosives length Edit field to change the explosives length of the selection (selected holes with selected deck number).
Changing this value will automatically update the top stemming values.
This value is calculated using the charging priority set in user preferences.
Explosives Cup Density Edit field to change the explosives final cup density of the selection (selected holes with selected deck number).
This will effect the explosives charge mass per meter and in turn the charge mass per deck / hole.
Calculate Charge button Pressing this button will switch the charge to be calculated on the deck properties.
Explosives Charge Edit field to change the charge mass of the selection (selected holes with selected deck number) manually.
Airdeck section Area to specify top / bottom airdeck length values for the selection (selected holes with selected deck number).
Bottom Plug section Section where you can change the bottom plug length and plug type of the selection (selected holes with selected deck number).