To properly display this page you need a browser with JavaScript support.
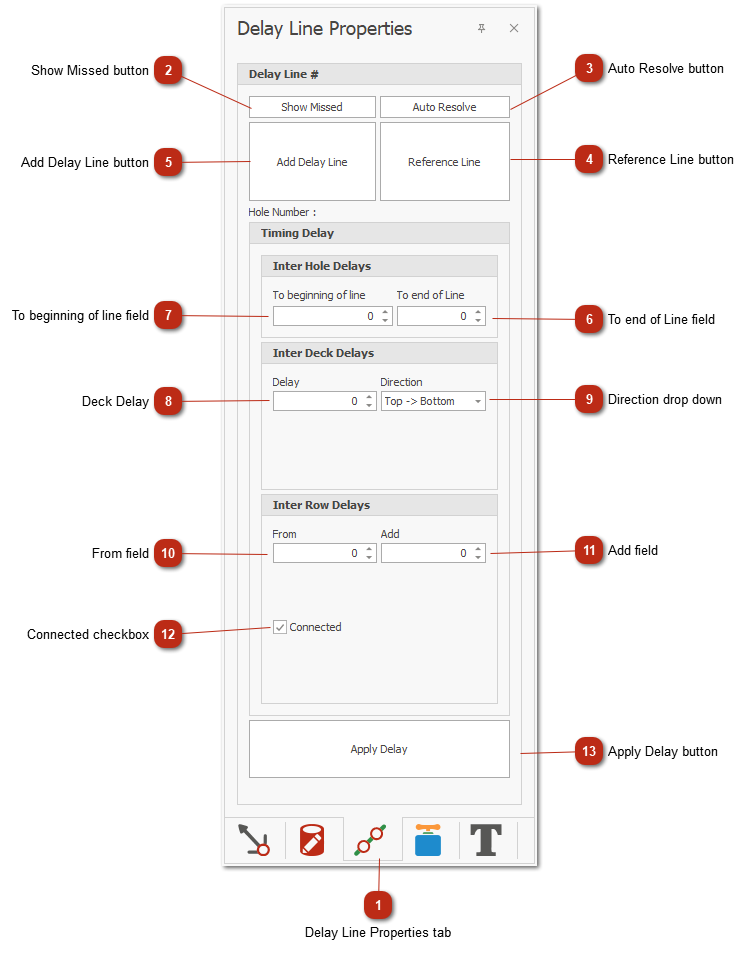
Delay Line Properties tab
Show Missed button Highlights the holes in the design that was not allocated to an Delay Line.
Auto Resolve button Will connect missed holes to the closest delay line.
Reference Line button Creates a reference point from where to apply timing to.
Add Delay Line button Switches to add delay line mode. BLASTMAPTM will remain in this mode until another mode is chosen.
When in this mode, left click on the canvas to start the delay line. Subsequent left clicks on the canvas will add to the line, snapping to holes within range.
Double left click to finish the line.
To end of Line field Enter the delay increment in between holes on the delay line. The delay is incremented in the direction going towards the end of the line.
To beginning of line field Enter the delay increment in between holes on the delay line. The delay is incremented in the direction going towards the begging of the line.
Deck Delay Enter the delay in between decks.
Direction drop down Select the deck increment direction.
From field Row delay that will be timed from.
Add field Delay value for inter row increments.
Connected checkbox Links the delay lines when applying delay values.
When they are linked, a change to a previous line will filter down to connected lines.
Apply Delay button Switches to apply line delay timing mode. Will remain in this mode until other mode selected.
When in this mode, left click on a hole (connected to delay line) to apply a timing to the entire line.
The line will be timed with above property settings and applied from the hole that was clicked.