DockPanel
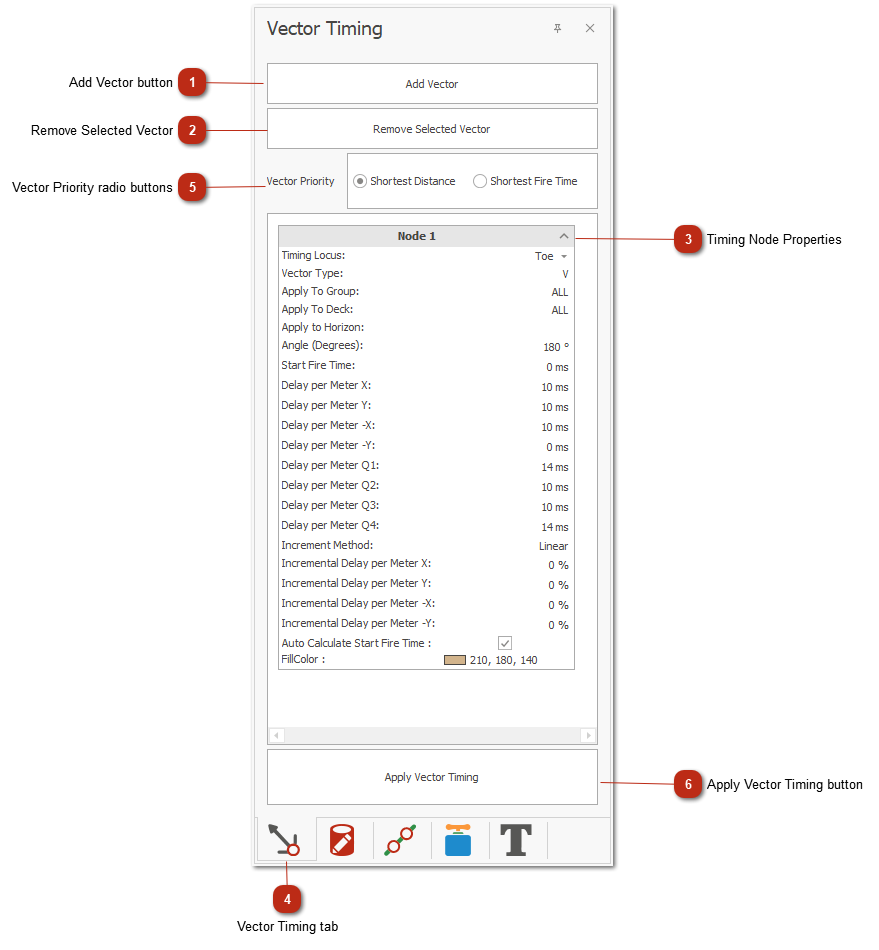
 Add Vector buttonSwitches user mode to "Add Vector" mode. Will remain in this mode until another is selected.
In this mode when you left click on the canvas for the first time , a new vector will be added.
A second left click on the canvas will add a second node connected to the newly created vector.
If only 1 node is need double left click after the first left click to finish the vector with direction.
|
|
 Remove Selected VectorRemoves the currently selected vector from the design.
|
|
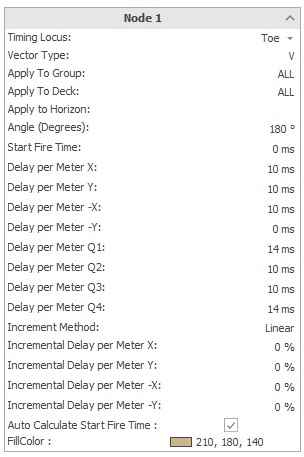
 Timing Node PropertiesThe node properties controls what timing to apply from the node. A vector can have multiple connecting nodes.
|
|
 Vector Timing tab |
|
 Vector Priority radio buttonsSelect the timing priority in between vectors here.
-
Shortest distance will time the holes with the closest vector. -
Shortest fire time will time the holes with all vectors and keep the shortest delay.
|
|
 Apply Vector Timing buttonChanges to the vector will only be saved after this button is pressed.
Once pressed the vector's timing will be applied to relevant holes.
|
|